We're going to assume you have a socket
FM1 motherboard and socket FM1 AMD processor at hand, both still
in their boxes. For this DIY Guide PCSTATS demonstrating the steps with an AMD A8-3850
'Llano' processor and a Gigabyte GA-A75M-UD2H motherboard.
Step 1: Remove the
motherboard from its box and protective packaging. Place the anti-static bag or
foam mat under the motherboard to protect it, then lay the board down on a flat
space like a
table.
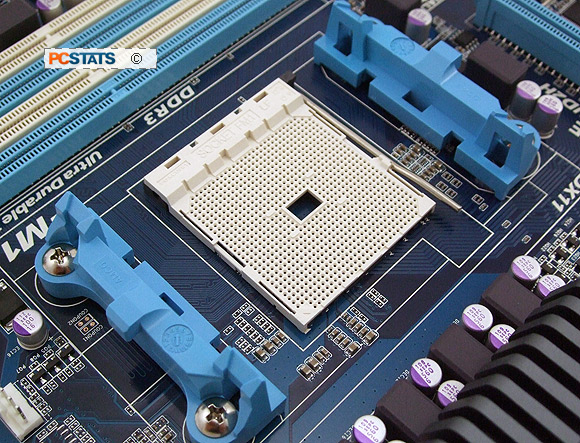
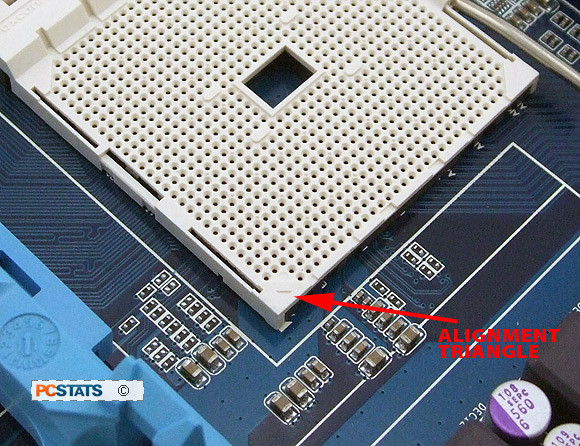
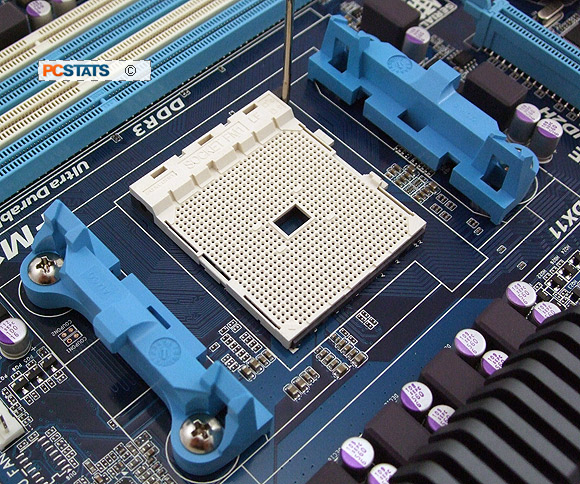
Step 2: Gently but firmly lift the sockets' metal lever up
to prepare the socket to receive a processor. This unlocks the FM1 socket and
make it possible to insert a processor. Note the location of the small triangle
molded into one corner of the socket (below, by red arrow), this is the processor
alignment symbol.
On a side note, this type of socket is technically known
as a Zero Insertion Force
(ZIF) socket. If you think about the force
needed to insert a simple two-prong wall plug it doesn't seem that
hard, but multiply that to 905-pins and you'd need a truck behind you to
get the plug in!! ZIF sockets alleviate this problem with microprocessors that contain
hundreds or thousands of contacts. The open ZIP socket doesn't make electrical
contact until the metal cam arm is closed and in that sweeping motion
every pin is slid latterly a millimeter or so into a V-shaped electrical groove,
making contact and locking the CPU in place. In the old days you'd
need a screwdriver to pry an Intel 486 chip out
of its socket... which lead to damaged chips with predictable regularity. Geek history lesson over.
Moving along...
Remove the AMD processor from its box and
plastic clam shell packaging. Take off the protective plastic chip carrier cover
(if any) and hold the processor by its corners. Now while holding the chip
by its sides or corners, take a moment to examine the underside of the AMD
socket FM1 processor and inspect the gold pins to ensure none
are bent and that no foreign material is present. If you see anything slightly out
of position, the processor may be damaged.
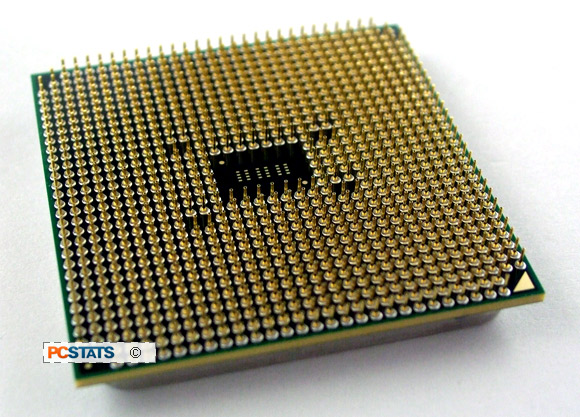
If a pin is out of place it may
be possible to very gently bend it back into alignment with the tip of
a pencil or other suitably clean and small implement. Note the
location of the little gold triangle in one corner of the
processor (it's printed on both sides of the chip). This is your processor
alignment symbol.