Installing a socket LGA1155 Intel Core i3/i5/i7
processor into a motherboard isn't super tricky task, unless of course you've
never done anything like this before... in that case it can be a little
intimidating. In the last couple weeks PCSTATS has received a few
questions from
readers who aren't entirely sure how to install
their new CPU into a fresh motherboard, or upgrade an older socket LGA1155
processor with a faster chip. At PCSTATS we've built hundreds of
computer systems while testing different motherboards and CPUs, but haven't ever documented the steps. So, here we
go!
In this straight forward Beginners Guide PCSTATS will show you all
the steps to installing and removing a socket LGA1155 Intel Core
i3/i5/i7 processor and heatsink. If you're planning computer build some time soon, bookmark this guide for future
reference.
A word of caution before we begin; there are two
components detailed in this article that you should never touch with your
fingers: The first component is the gold interface pads on the bottom of the processor.
The second is the extremely
delicate gold pins in the LGA1155 socket on the motherboard.
Meet the Parts: Intel's LGA1155
Processor
On the bottom of socket LGA1155 Intel processors you'll
find one thousand, one hundred and fifty-five small gold pads and a small patch of microscopic electrical components. The gold pads make
contact with corresponding electrical contacts in the processor socket on the motherboard. As you
might have guessed, socket LGA1155 processors are only compatible with motherboards built with an LGA1155 socket.
Intel warns that the oils on your skin can damage the
electrical contacts on the base of the CPU, so only handle the chip by its edges.
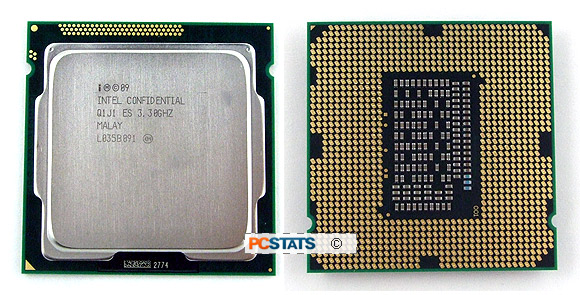
An Intel socket LGA1155 CPU (top and
bottom)
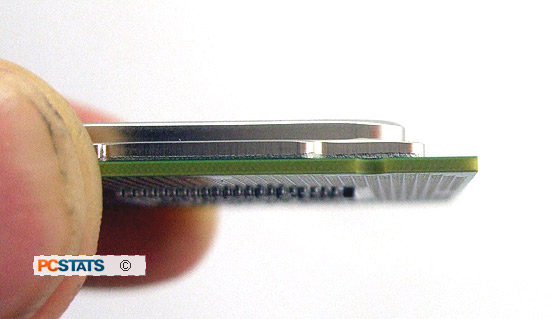
Pictured above is
the correct way to hold a socket LGA1155 processor, or any CPU for that matter.
Grasp the chip carefully by the edges of the green PCB substrate and keep your fingers away from the gold pads. This way of holding a CPU will
also limit accidents from static electricity.
In general, it's best to leave the black plastic protective chip carrier on the bottom of the CPU until you're ready
to install the CPU into the motherboard.
Meet the Parts: LGA1155 Socket
Heatsink
CPU heatsinks
come in all different shapes and sizes, for Intel
and AMD processors, but what separates them apart is primarily socket compatibility.
For the purposes of this Beginners Guide, PCSTATS will be installing Intel's
stock LGA1155 CPU cooler. For 80% of users this heatsink is
good enough... if you're a performance user or demand super quiet operation
head over to Frostytech for at look at the Top 5
heatsinks they've tested
out of +400 thermal solutions.
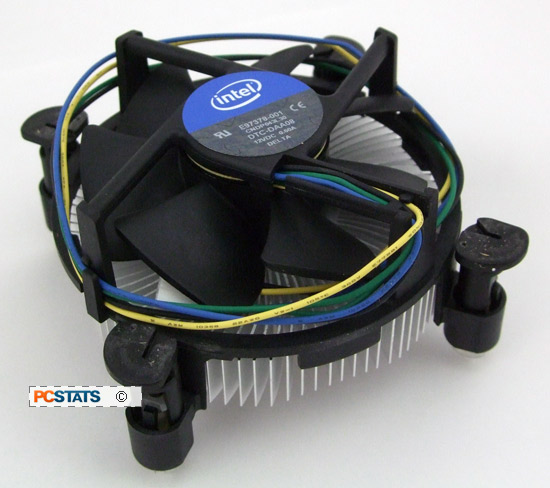
This
Intel heatsink comes with thermal compound already applied to the base, so
we don't need to worry about that. When installing a heatsink, ensure there
is always a small amount of thermal paste
between the cooler and CPU.
Meet the Parts: the LGA1155
Socket
The Land Grid Array processor socket consists of a top
metal pressure plate, a small metal lever, an array of tiny gold pins
which make electrical contact with the base of the CPU,
and a rear metal support plate behind the PCB. The LGA1155 socket is shown below with its
protective plastic cover removed so you can see the pins which
interface with the CPU.
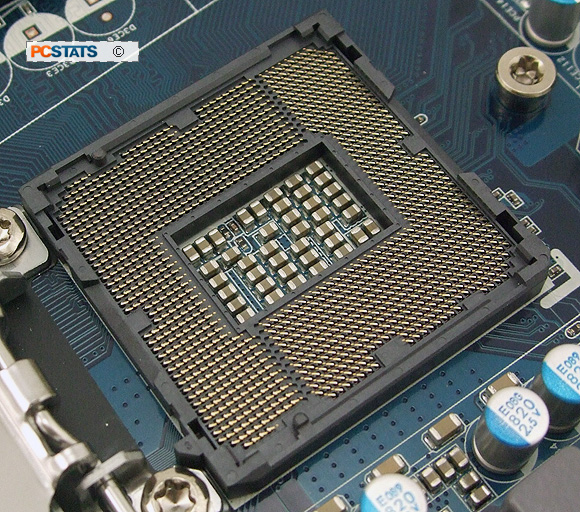
LGA1155 CPU Socket
(protective cover removed)
As you can tell by the photo, these tiny gold pins are very delicate.
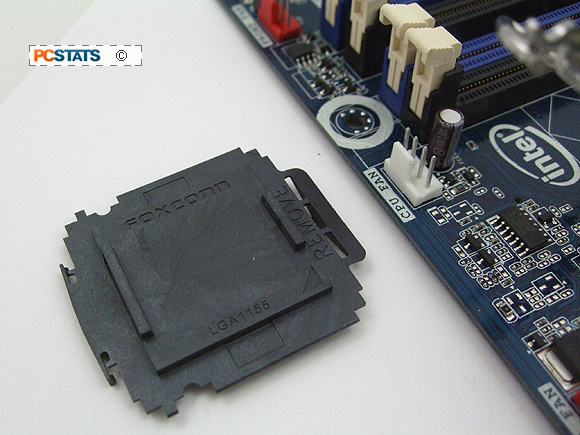
A protective plastic cover sits over these pins when no processor
is present, it's considered best practice to only remove the cover just before
the CPU is installed.
Now that we're familiar with the parts of the CPU
socket, let's move on to the step by step process of installing an Intel socket LGA1155 Core i3/i5/i7 processor and heatsink correctly. It's not the hardest thing in the world to do, but it pays to be
careful and follow a predetermined set of steps. If you'd like to know how to remove the heatsink and CPU, jump ahead to page
5.
Next up: Installing an Intel LGA 1155 Processor Safely