Like Windows XP, SUSE Linux prompted you to create a
user account during the installation process. This user is separate from the
systems administrator account (known as 'Root' in Linux). Since you logged in as
this secondary user, you do not have the necessary authority to configure the
system. Any time you attempt to use a program that requires administrative
'root' access, a window will pop up, prompting you for the root password.
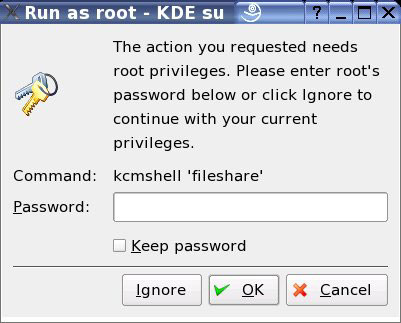
When you enter this password, you are now operating as the root user for the
purposes of this application only. Closing the application removes these
special privileges.
Configuring your monitor and
desktop
Our next order of business is getting your desktop set to the resolution and
refresh rate that you are comfortable with. Click the SUSE 'start' button
and choose 'YaST' from the top of the menu to start this configuration
tool. This is the same tool we used to install SUSE, and it takes care of
most of the hardware configuration chores in this particular Linux
distribution. Choose 'hardware' then 'graphics card and monitor.'
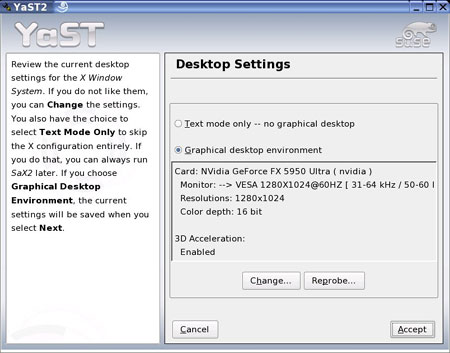
The 'desktop settings' window will pop up. Take a minute to review the
information it's showing you. If the 'card:' and 'Monitor:' lines both
contain the correct brand names and model number of your video card and monitor
respectively, you can close the settings window now. If you have your
video card listed correctly but the monitor is listed as a 'VESA' device, it's
time to do a little configuration.
Click 'change' then choose 'monitor' on the screen that appears next.
From the 'currently configured monitors' screen, click 'properties.'
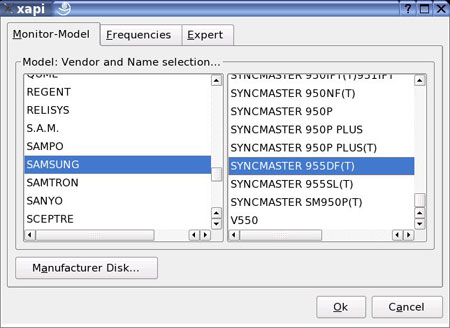
You'll be presented with a list of monitor manufacturers and model
numbers. Locate your screen's manufacturer and model if possible. If
your particular monitor is not listed, scroll to the top of the list and
highlight VESA or LCD (if you are using a flat-panel LCD monitor), then choose
an appropriate resolution and refresh rate from the right-hand panel.
Once you have found your monitor model or chosen an acceptable refresh
rate, click 'ok', then 'finish' then 'finalize...' to exit the configuration
utility. You'll want to test the configuration before you leave, following
the on screen prompt and instructions.