Lay the computer case flat with the motherboard and
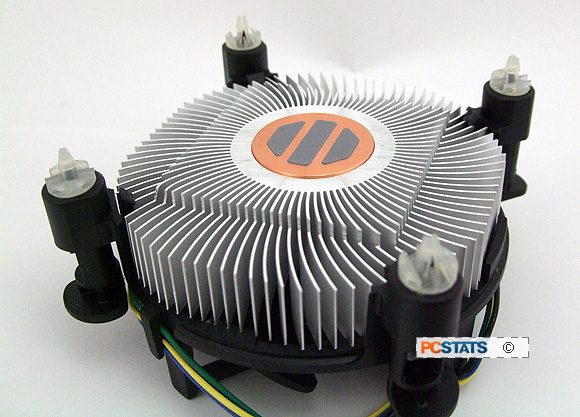
processor facing you. Remove the heatsink from the processor box and check the
bottom to make sure that the thermal interface material on the bottom is undamaged.
You don't need to add any additional thermal paste with the stock Intel
heatsink.
If the heatsink you have did not come with pre-applied
thermal compound, apply a bit to the top of the CPU and bottom of
the heatsink and spread it evenly with your finger. Only cover the portion of
the heatsink base which will contact the CPU. Never install a heatsink without thermal
compound!
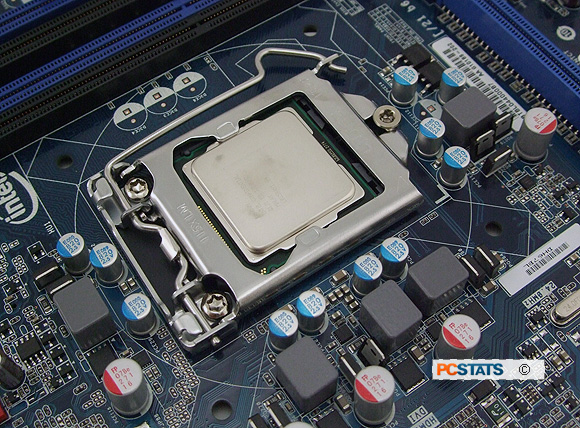
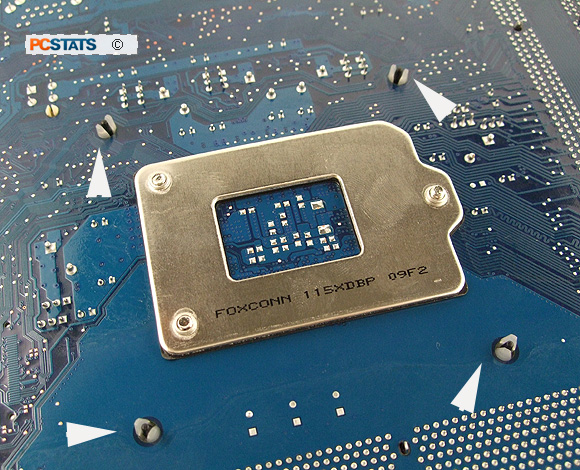
Notice the
four holes in the motherboard PCB around the LGA1155 CPU and socket? These coincide with the 'legs' of your
socket 1155 heatsink.
Step 3.
To install the heatsink, lower it down vertically onto the processor so that each of its plastic 'legs' lines
up with the four holes in the motherboard. There is no special way the heatsink
has to face, as long as the pointy end of each of the 'legs' fits into one of the holes
that's what's important.
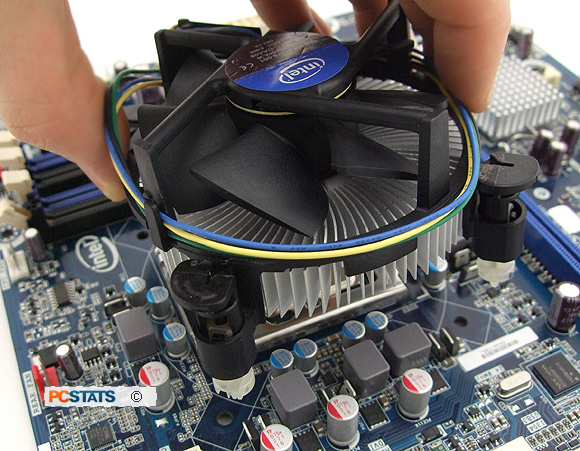
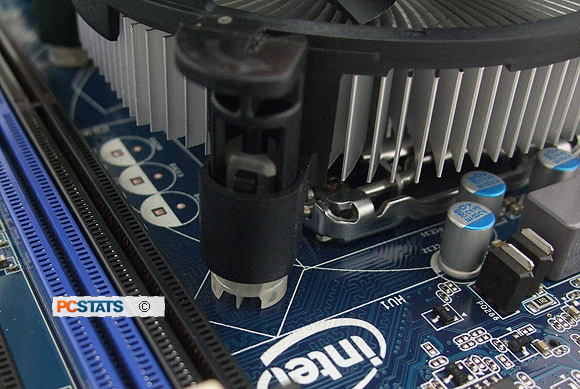
Most Intel heatsinks use push-to-click plastic retention
studs. For these mechanical locks to work correctly, ensure that the black top
of each fastener is rotated into the correct locking orientation, with the arrow
pointing away from the heatsink
, the groove in the top oriented towards the center
of the heatsink. This orientation ensures the fastener will lock into place
when pressed down.
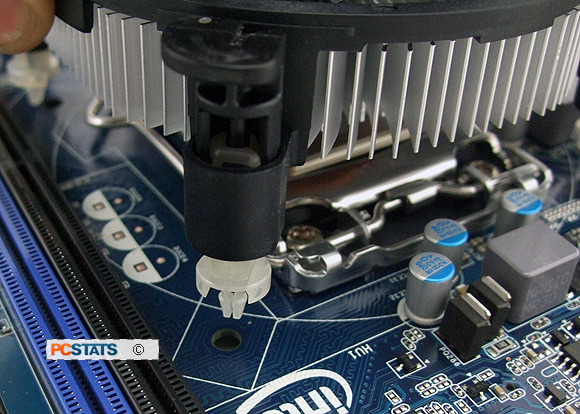
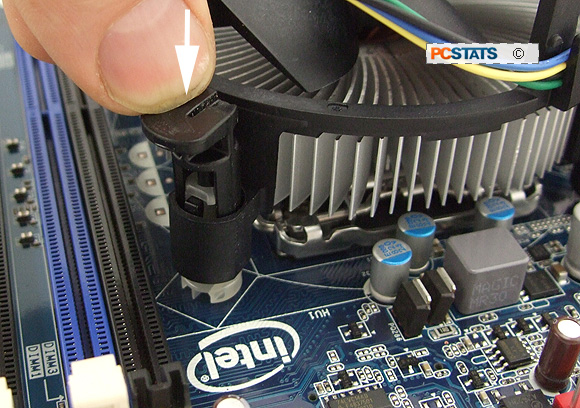
Once the heatsink is sitting on the processor with one fastener in each motherboard hole, hold
it in place with one hand while pressing down firmly on each of the
fastener 'legs' in turn.
You should hear a loud click to indicate when each
clip is locked in. Ensure that the heatsink is sitting evenly on top of
the socket and processor.
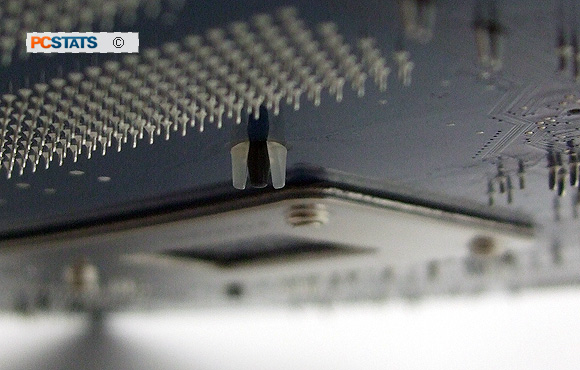
What's happening is a little bit of the black
plastic is spreading apart two white plastic tabs which lock onto the
motherboard PCB when they are open all the way. It's easy to see this by
examining the rear of the motherboard.
With all four push-to-click tabs locked in place, it's
now time to plug in
the CPU heatsink fan power cable to the right 4-pin or 3-pin connector on the motherboard.

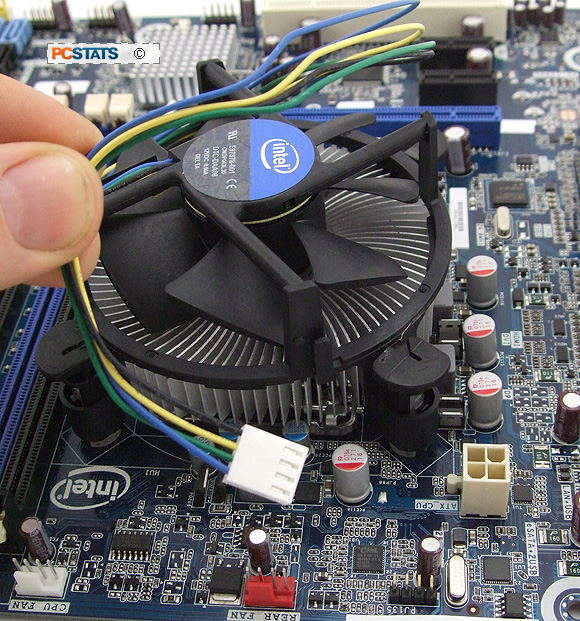
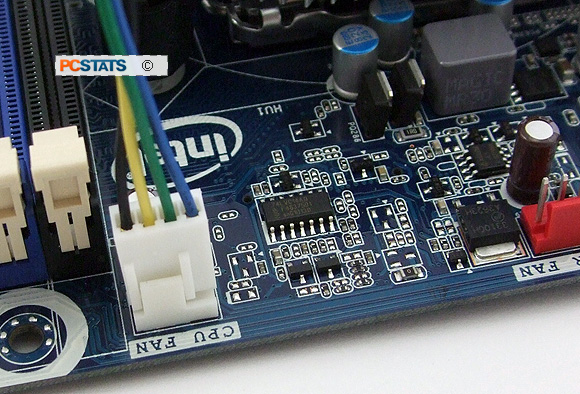
Consult your motherboard manual if you are unsure of the
location, generally speaking you want to plug the CPU heatsink fan power cable into the fan header marked "CPU_Fan" so the
BIOS will report the right RPM levels. Ensure that the fan power cable cannot
become snagged in the fan blades. That's it! The processor and heatsink are now
installed correctly.
If you need to remove or upgrade
the Intel socket LGA1155 processor, PCSTATS covers this procedure next. You'll need a
flathead screwdriver as well as the plastic protective covers for both the socket and
the processor.