PCSTATS     
[X]   Directory of
Guides & Reviews

Beginners Guides
Motherboards by Brand
Weekly Newsletter
Archived Newsletters

+70 MORE Beginner GUIDES....
Beginners Guide: Install/Remove Intel Socket LGA1156 CPU and Heatsink
Beginners Guide: Install/Remove Intel Socket LGA1156 CPU and Heatsink - PCSTATS
Installing a socket LGA1156 Intel Core i3/i5/i7 processor into a fresh motherboard as part of a new PC build can be intimidating step, particularly if you've never worked inside a computer before. PCSTATS received a few emails from novice readers on this subject, so we thought it worthwhile to lay out the steps for you in this Beginners Guide.
Filed under: Beginners Guides Published:  Author: 
External Mfg. Website: PCSTATS Nov 18 2013   Max Page  
Home > Reviews > Beginners Guides > PCSTATS Beginners Guide

Inserting the socket LGA1156 CPU the right way

Step 2: Remove the Intel processor from its box and plastic clam shell packaging. To take off the protective black plastic chip carrier cover, hold the processor by its corners and release one of the plastic tabs. Be careful not to touch the gold pads on the underside.

Now look at the bottom of the processor. Check for any damage or foreign material on the contacts. Also note the two alignment notches on either side of the processor (highlighted below by white arrows).

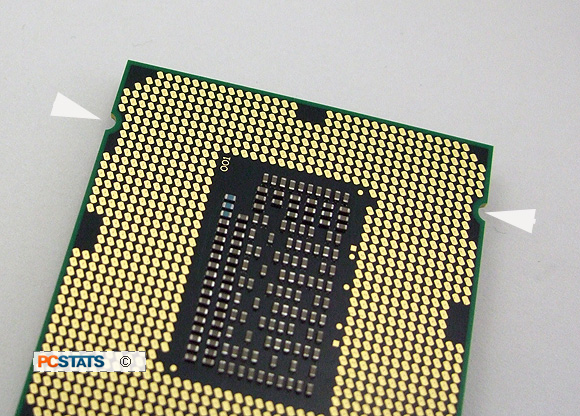
The notches are keyed to a pair of plastic tabs in the LGA1156 socket, ensuring that the processor will only seat properly in one direction.

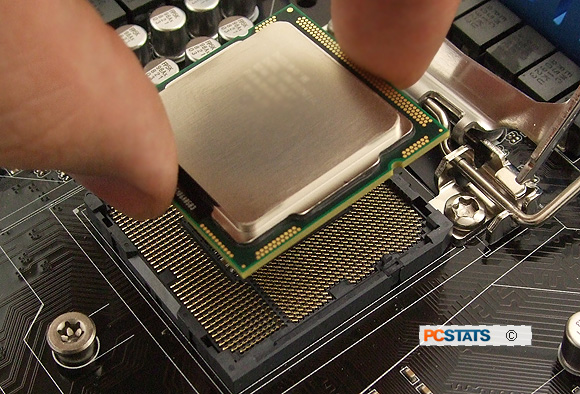
Hold the processor by the sides without notches. Orient the chip so the notches are lined up with the socket tabs and lower the processor 
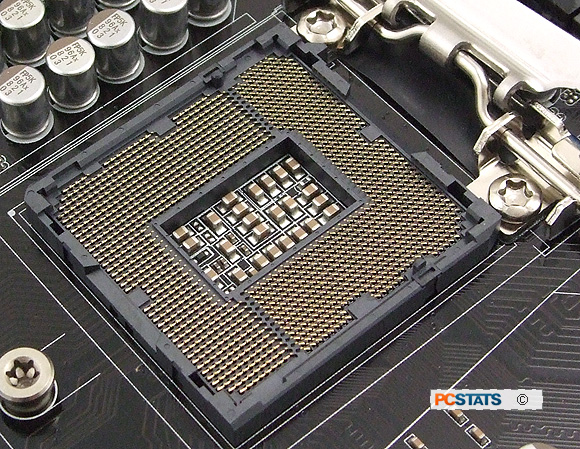
straight down into the socket gently, ensuring that it sits evenly. Note the two spaces in the grey plastic socket frame in the image below, this is where your fingers should grip the Intel processor as there isn't adequate clearance on the other sides.

Processor alignment notches are highlighted by the white arrows.

It's advisable not to drop the CPU as that may damage the fragile contact pins.

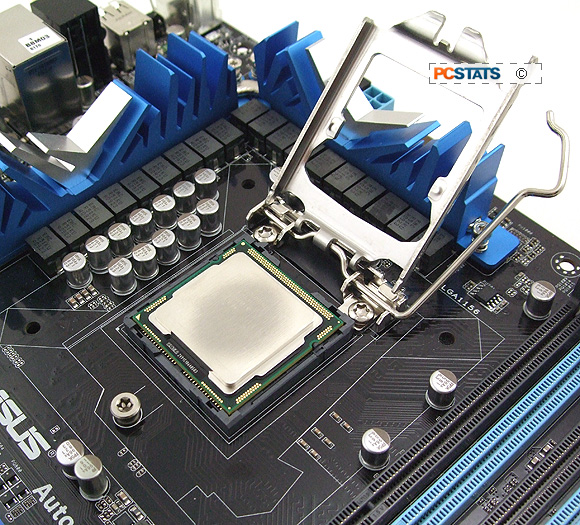
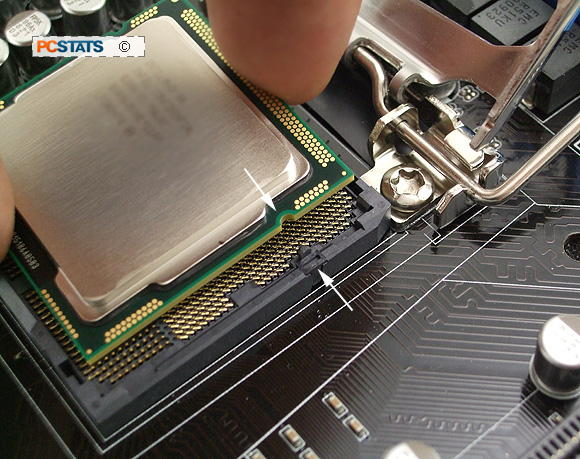
The Intel processor should sit flat in the LGA1156 socket, with the little gold triangle in the corner opposite the cam lever arm.

If the CPU is not flush in the socket, or the tabs are not aligned, remove the CPU and double check the orientation is correct. No force is required to install the CPU in the socket - if you have to force the chip, something is incorrect.

Next - Locking the CPU in place.

< Previous Page © 2023 PCSTATS.com
Please respect the time and effort that went into creating each PCSTATS Beginners Guide, do not illegally copy. Thank you.
Next Page >


Contents of Article: PCSTATS Beginners Guide
 Pg 1.  Beginners Guide: Install/Remove Intel Socket LGA1156 CPU and Heatsink
 Pg 2.  Step 1: Installing an Intel LGA1156 CPU
 Pg 3.  — Inserting the socket LGA1156 CPU the right way
 Pg 4.  Locking the Processor in Position
 Pg 5.  Installing an Intel CPU Heatsink
 Pg 6.  Removing Socket LGA1156 heatsinks and processors safely
 Pg 7.  Removing Socket LGA1156 processors safely

 
Hardware Sections 


PCSTATS Network Features Information About Us Contact
FrostyTech
PCSTATS Newsletter
Tech Glossary
Technology WebSite Listings
News Archives
(Review RSS Feed)
Site Map
PCstats Wallpaper
About Us
Privacy Policy
Advertise on PCSTATS

How's Our Driving?
© Copyright 1999-2023 www.pcstats.com All rights reserved. Privacy policy and Terms of Use.