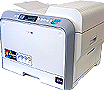
While the CLP-550N does
not have a particularly large footprint (at about one and a half feet square,
it'll take up as much desk room as a typical 19" CRT monitor), an it is
heavy. With all cartridges and ink installed, the CLP-550N weighs
over 70 pounds. Bring a friend.
Included in the package are four toner cartridges: one black, one
cyan, one magenta and one yellow. These are the lower yield 'starter' versions of the
main cartridge for the CLP-550N and should handle about 2000 pages of black text and
1500 full colour pages (based on a 5% percent page covering).
 The full cartridges for the printer (which must be purchased separately) are capable of 7,000 black/5,000 colour
sheets at 5% text coverage, according to Samsung. Costs for the full cartridges are about
US$90 for the black and $105USD for each of the colour cartridges. So, the full
cost of a brand new set of toner cartridges works out to about $405USD.
The full cartridges for the printer (which must be purchased separately) are capable of 7,000 black/5,000 colour
sheets at 5% text coverage, according to Samsung. Costs for the full cartridges are about
US$90 for the black and $105USD for each of the colour cartridges. So, the full
cost of a brand new set of toner cartridges works out to about $405USD.
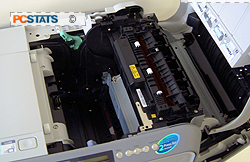
Also separately packaged are the imaging unit (drum) and
the transfer belt cartridges. These must both be installed before the printer
can be used, and rather quickly at that as light can damage the imagining unit
if it is exposed to it for too long. 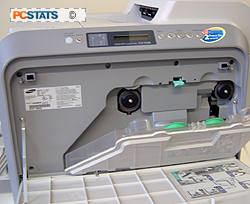
These are each rated for 50,000 sheets/12,500 sheets colour
and cost about US$140 to replace. That boosts the total cartridge (toner, and imaging units) replacement cost
to about $685USD. A new waste toner tank runs about $18USD, and
the one that ships with the unit is good for 12,000 sheets.
Rounding out the package are manuals for the printer and the Samsung SyncThru
network printer software (more on this later), the necessary CDs and a power
cable. No printer or network cables are included, which was a bit annoying to
see given the higher-end price of this printer.
The manuals themselves are brief but well written and illustrated. This is
essential, given the initial complexity of the install process. The printed
manual for the Samsung CLP-550N only covers installation and setup, not how to use the
printer and its features. For this you need to consult the user's guide included
on the driver CD. While we would have preferred to see a hard copy of this
information also, it gave us something to print out to test the printer!
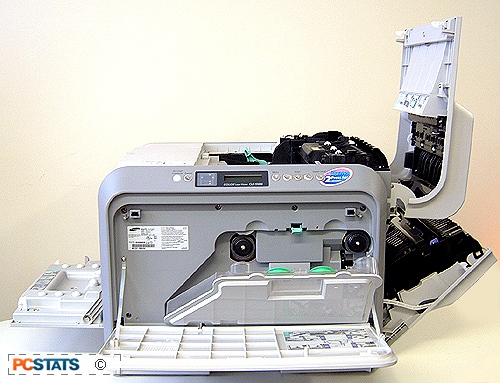
The printer is covered with various doors and hatches,
all of which are simple and smooth to operate. Again, construction is primarily of plastic components; something to keep
in mind if your office is hard on its equipment.
Interface and
Menus
The CLP-550N accepts standard IEEE 1284 parallel printer
cables as well as USB and USB 2.0 cables (the best option in most
circumstances).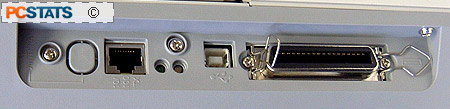 In addition, the
interface panel includes a standard 10/100 Ethernet port for wired networking
and an antenna for wireless networking if this option is installed
(it can be user installed after the appropriate hardware is purchased).
In addition, the
interface panel includes a standard 10/100 Ethernet port for wired networking
and an antenna for wireless networking if this option is installed
(it can be user installed after the appropriate hardware is purchased).
The paper drawer is located on the bottom front of the printer
and accepts up to 250 letter sheets at a time. A second multi-purpose drawer
folds out from the right hand side and can accept up to 100 legal sheets, or varying
numbers of envelopes, postcards and transparencies.
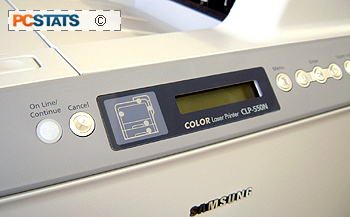
Printer information is displayed on a small,
32-character monochrome LCD display. Menu and navigation buttons are on
the right of this screen, as well as a cancel button. Rounding out the
controls is a light-up online/continue button.
 The menu options are accessed via the navigation buttons
next to the LCD and work on a typical drill-down menu system. Most of the
options can be set via the standard Windows XP control panel printer screens,
but if you do find yourself needing to make changes via the menu buttons, you can get a printout of all current settings by going
to 'menu\information\configuration' in the onboard menu.
The menu options are accessed via the navigation buttons
next to the LCD and work on a typical drill-down menu system. Most of the
options can be set via the standard Windows XP control panel printer screens,
but if you do find yourself needing to make changes via the menu buttons, you can get a printout of all current settings by going
to 'menu\information\configuration' in the onboard menu.
The menu controls are a bit cumbersome, as you might expect, and we found
ourselves doing most of the configuration through the Windows XP control panel,
which worked fine once the computer was connected via USB or network.
The printer software installs automatically and
painlessly, and the printer was up and working five minutes after we had
finished installing the cartridges. The user guide is also included in the installation, so
you do not have to resort to the CD once you have
the drivers installed. The SyncThru networking software was also easy to install.