The external drive bays
are tool-free and use dual locking mechanisms to secure the drives. The
internal 3.5 inch hard drive bay can hold five drives and uses rails for
installation. One rail must be clipped to each side of the hard disk, then it can
be pushed into the slot where it will clip securely in place. We appreciated the
vent holes punched into the side of the hard disk chassis, though it would have
been nice if the whole drive bay was removable.
|
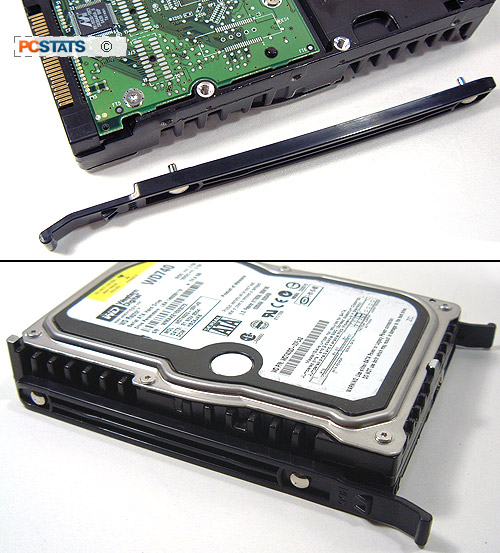
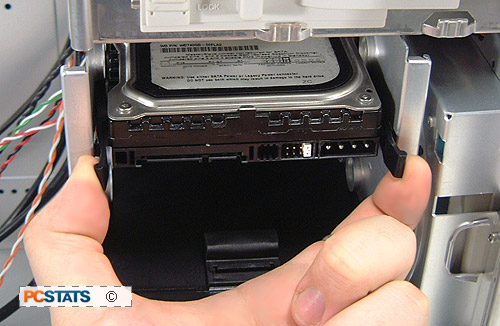
HDD drive
rails shown up close and personal with an ultra fast Western Digital WD740
serial ATA hard drive.
Insert the two tabs into the appropriate holes on both sides of
the HDD and it's ready for installation into the rack. No tools
required.
|
The seven rear expansion ports at the back of the 3D Aurora
570 case also have a screwless way of holding those pesky PCI brackets in place.
The black locking tab above the ports flips back to loosen a securing
mechanism, allowing videocards or other devices to be inserted or removed. To
lock all the PCI brackets in place, just rotate the lever
back into position and everything will be held securely in place. By
this time you've just got to love tool free cases!
|
Installation of peripherals is tooless. Flip up
expansion lock to the left, insert your card then lock it back into place.
This system is very durable and should not come loose even when the PC is
being moved too and from LAN
parties.
|
Motherboard and peripheral installation
Before inserting the motherboard into the case, do not forget to install
the motherboard spacers onto the tray (included with the case). The large amount of
room to work with is definitely appreciated. Tweakers will find it easy to play
inside the Gigabyte 3D Aurora 570.
The expansion slot covers
are locked into place by a single black locking tab which secures a swivelling locking
mechanism. When this is opened, you can easily remove the slot covers and install
your PCI Express and PCI hardware. Closing the tab then locks the expansion cards
into place. Oooo tooless design. ;-)
|
To install 5.25" drives, simply slide them in through the bezel, look through
the circular holes on the locks and wait for them to match up with the
drive. Once they do, move the lock forward and that secures the 5.25" drive into
place. I love this method and it's much easier to do than screwing in the
drive.
|
Installing 5.25" devices is a snap with Gigabyte's rail system. First remove
set the optical drive locking mechanisms to unlock, remove front bezel
and slide the optical drive into place. Once that's done move the beige
plastic retention mechanism to the locked position. The space is tight, so if the drive sticks
give it a good whack! Follow with however many optical drive sized devices you
have, again this is completely tooless too.
|
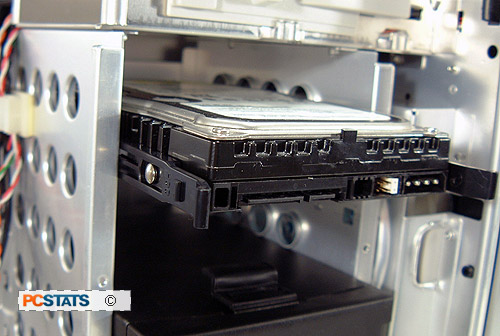
Installing the hard drives requires the use of drive rails. Line the inserts up
with the HDD holes and insert. Once that's done, slide the hard drive into
the open slot until it clicks in place. This method is very simple to use
and I wish more case manufacturers would adopt tooless
designs!
|
|
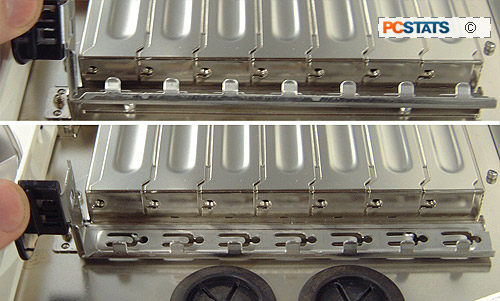
To remove
the HDD you must squeeze the two locks inward as shown then the HDD slides
out easily. The drives
are positioned so connecting power and SATA or IDE data cables is easily accessible to
the
user.
|
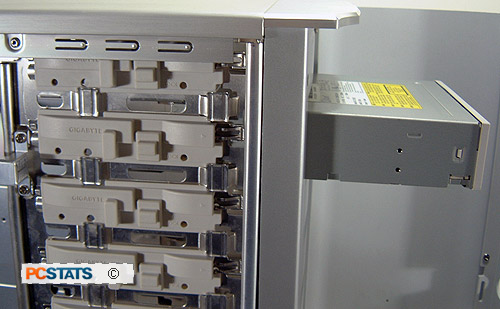
The
five internal 3.5" drive bays are set at a 90 degree angle to the rest of
the drives in the system. This makes installing and connecting cables much easier in an installed
PC. To install a
hard disk, you clip one of the ten included rails to each side of the drive,
then slide it into the bay until it clips into place.