PCSTATS     
[X]   Directory of
Guides & Reviews

Beginners Guides
Motherboards by Brand
Weekly Newsletter
Archived Newsletters

+70 MORE Beginner GUIDES....
Beginners Guides: Repairing a Cracked / Broken Notebook LCD Screen
Beginners Guides: Repairing a Cracked / Broken Notebook LCD Screen - PCSTATS
A broken or cracked LCD screen makes a laptop utterly useless, good thing PCSTATS can show you how to replace that busted laptop screen with a minimum of fuss and for less money than a service center charges. PCSTATS will be fixing a cracked LCD screen on a Lenovo T530 ThinkPad notebook, the general procedures outlined here work for any notebook though.
Filed under: Beginners Guides Published:  Author: 
External Mfg. Website: Beginners Guides Aug 26 2018   Max Page  
Home > Reviews > Beginners Guides > Beginners Guides Beginners Guides

Step Four: Disassembling the Notebook Pg 2

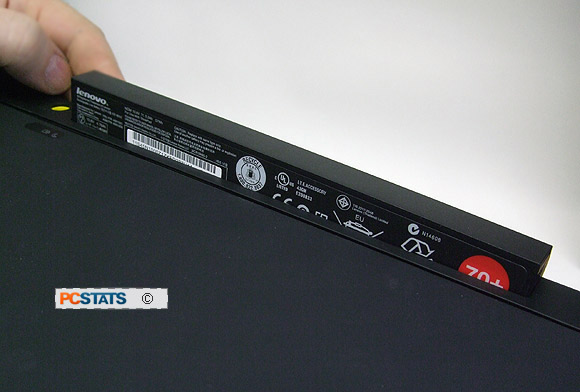
If you haven't already done so, remove the notebook's battery.

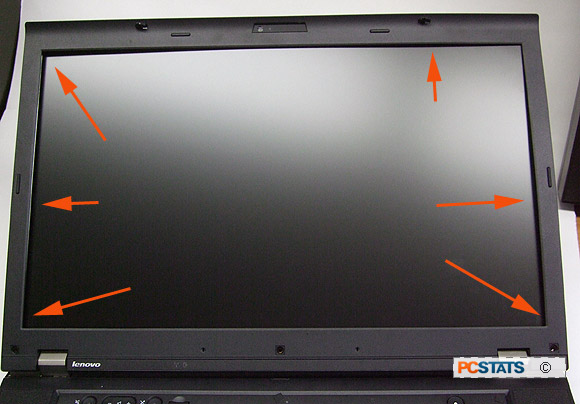
Use the edge of a credit card or a fingernail to start working the two halves of the plastic bezel apart. It's best to start from the bottom where space has been opened up and work around the peripheral of the screen assembly with the edge of a credit card in the parting line, carefully popping the internal hidden plastic snap tabs free. These small tabs hold the screen bezels together.

Don't insert the parting tool too far into the bezel, this can snap off bits of plastic which hold the front and rear bezels together or break off other components which aren't visible. Also, never leverage against the LCD screen glass or use a metal tool to separate the two bezels; metal tools dent the soft plastic and leave marks.

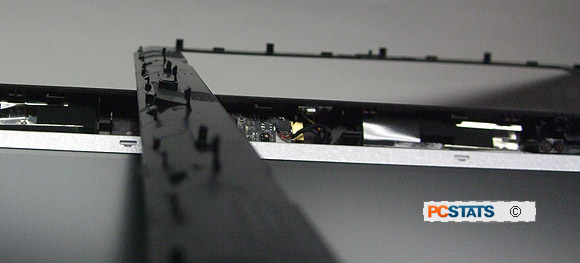
In the photo above you can see the little snap tabs we worked slowly and methodically to free from the rear half of the screen bezel. The "bezel" is simply the industry word for the narrow frame around the screen. You don't want to damage any plastic parts of the notebook screen, take your time and don't force anything.

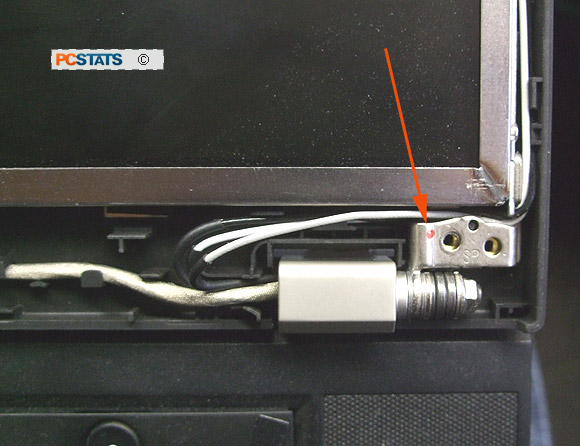
The cracked LCD screen panel we need to replace is attached to an internal metal frame, which is in turn attached to the rear plastic bezel and hinges with four screws. Go around the metal frame and remove the screws holding it to the rear screen assembly. Mark each screw you remove with a small dot from a Sharpie marker (see orange arrow above).

When it comes time to reassemble the screen, these dots will remind you where to re-insert screws. This is particularly helpful when holes are placed side-by-side, as in the photo above.

< Previous Page © 2023 PCSTATS.com
Please respect the time and effort that went into creating each PCSTATS Beginners Guide, do not illegally copy. Thank you.
Next Page >


Contents of Article: Beginners Guides Beginners Guides
 Pg 1.  Beginners Guides: Repairing a Cracked / Broken Notebook LCD Screen
 Pg 2.  Step Two: Answer the Four-point Technical Detail Checklist
 Pg 3.  Step Three: Buying a Replacement Notebook Screen
 Pg 4.  — Step Four: Disassembling the Notebook Pg 2
 Pg 5.  Step Four: Disassembling the Notebook Pg 3
 Pg 6.  Step Four: Disassembling the Notebook Pg 3
 Pg 7.  Step Four: Disassembling the Notebook Pg 4
 Pg 8.  Step Five: Installing the Replacement Screen
 Pg 9.  Step Five: Installing the Replacement Screen Pg 2
 Pg 10.  Step Five: Installing the Replacement Screen Pg 3
 Pg 11.  Step Five: Installing the Replacement Screen Pg 4
 Pg 12.  Other Reasons Why Laptop Screens Sometimes Go Dark

 
Hardware Sections 


PCSTATS Network Features Information About Us Contact
FrostyTech
PCSTATS Newsletter
Tech Glossary
Technology WebSite Listings
News Archives
(Review RSS Feed)
Site Map
PCstats Wallpaper
About Us
Privacy Policy
Advertise on PCSTATS

How's Our Driving?
© Copyright 1999-2023 www.pcstats.com All rights reserved. Privacy policy and Terms of Use.