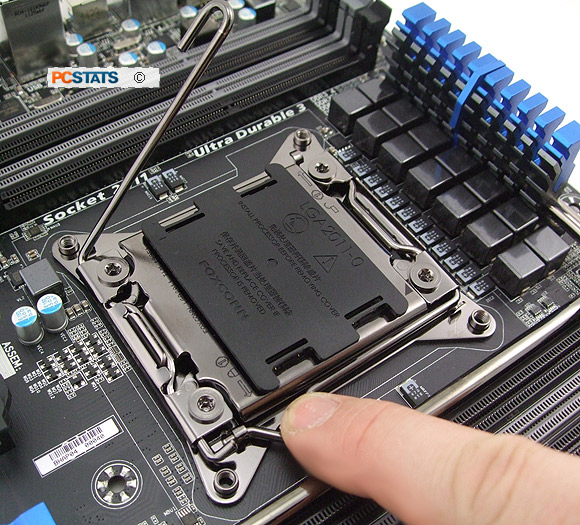
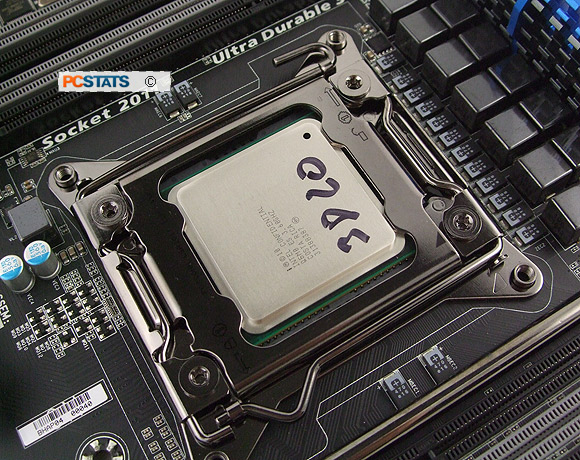
Next, close the top metal load plate.
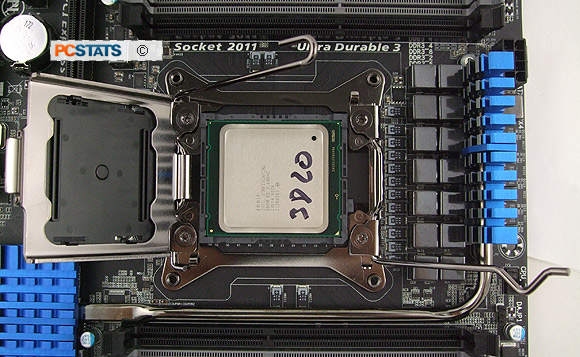
To lock the CPU in
place, rotate the second metal lever arm (this is the lever with the little triangular bend at the
end) back down to its closed position.
This lever arm has to engage with the
tab of the top metal load plate so you may need to press it down gently on that
with a finger while rotating the arm.
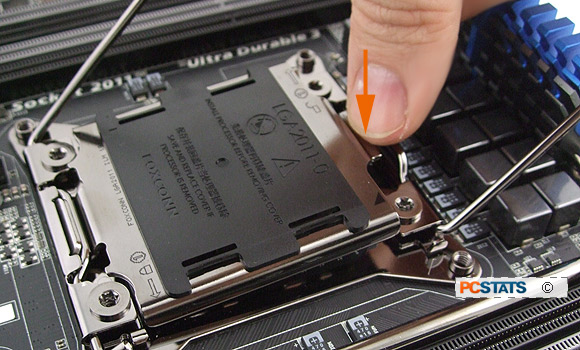
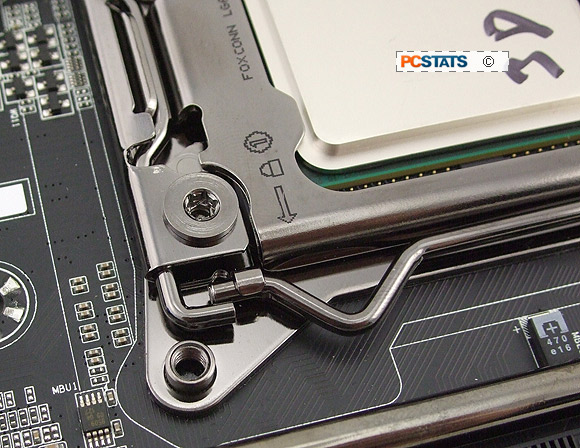
Lock the second lever arm back under its
catch.
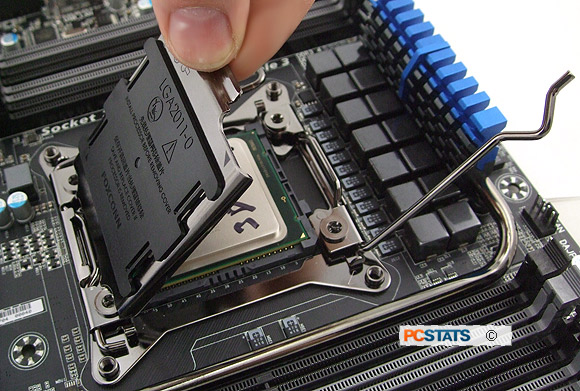
At this point
the black plastic protective cap should pop free
of the top metal load plate. Remove the protective cap and store it in the
motherboard box. You will need to replace this cap if you ever upgrade your
motherboard in the
future.
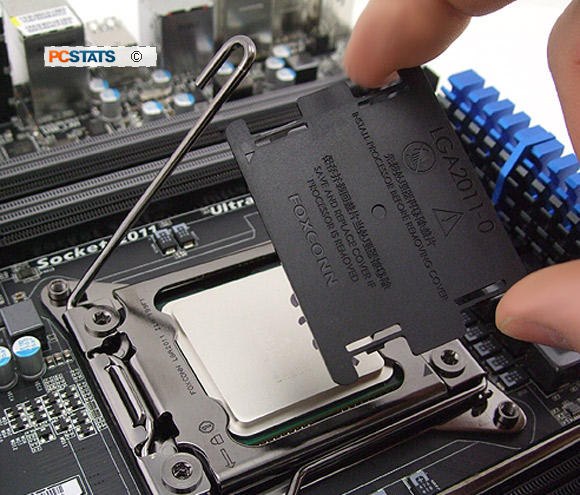
Don't discard this plastic protective
cap!
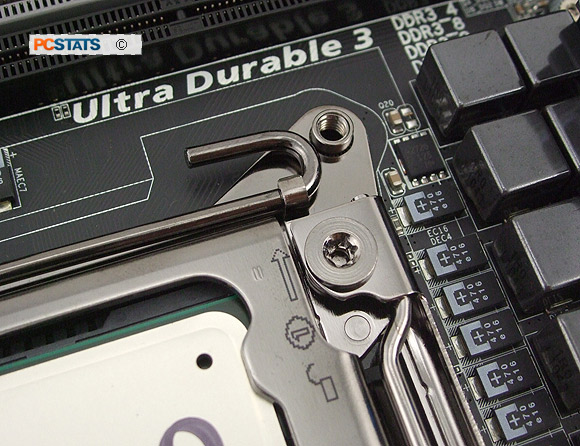
Finally, close the first metal lever arm and lock it under its catch.
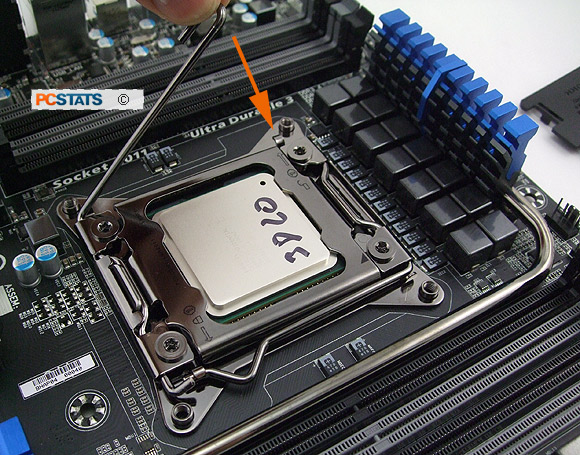
Tuck the end of the lever arm under the small metal tab to lock it back
into the closed position.
That's
it, you've successfully install an Intel LGA2011 processor!
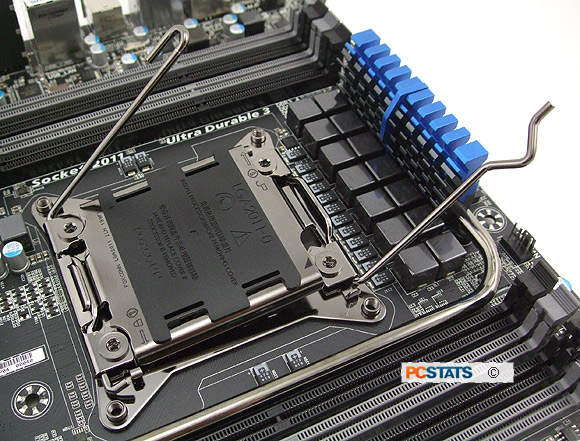
To recap, the second lever arm should look
like this if it's in the correct, locked position:
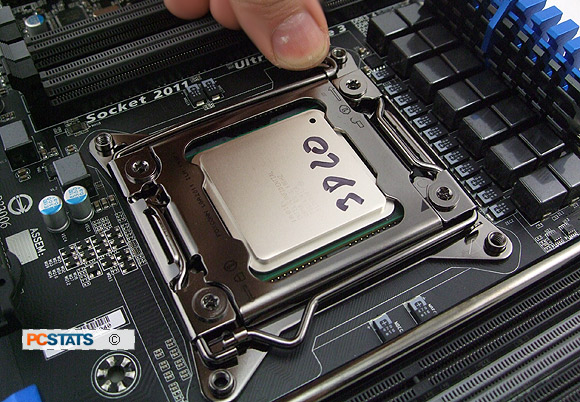
The first lever arm will look like this if it
is in the correct, locked position:
At this point, install the motherboard into the
computer case. If you need any help on this topic, see this PCSTATS Beginners Guide on the subject.
Install the LGA2011 CPU Heatsink
Last but not least, you will need to apply thermal compound to the top of the
processor and install a socket LGA2011 compatible heatsink.
The step is best accomplished with the motherboard
installed in the computer case and the case laying flat on a table. Remove
the heatsink from its packaging and follow the instructions to install it.
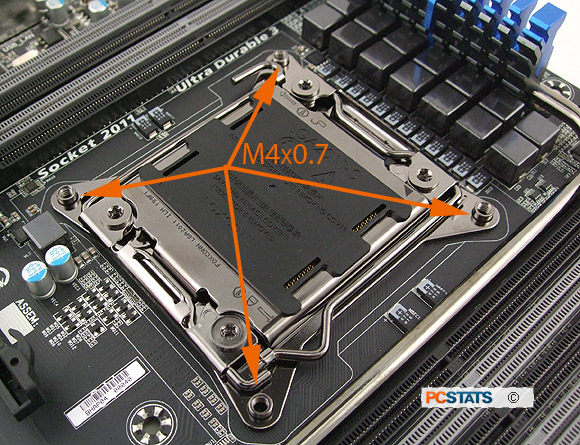
Heatsinks compatible with Intel socket LGA2011 processors mount to the four
M4x0.7 threaded metal studs of the LGA2011 socket, so the process is pretty
easy. Since most consumers elect to buy an aftermarket performance heatsink
PCSTATS is not going to cover this step in detail. FYI - Frostytech.com
has great recommendations on which LGA2011 heatsinks perform the best.
Removing a Socket LGA2011 Processor
To remove the Intel socket LGA2011
processor, just reverse the steps PCSTATS has outlined in this Beginners Guide. Start by releasing the first and second lever arms,
then lift up the top metal load plate to expose the processor.
Pick up the processor from the socket by its edges and place it back into the container Intel sold
it in. Wipe off excess thermal compound with a bit of paper towel.
Always apply fresh thermal compound when installing a heatsink onto a processor and always wipe off old thermal
compound immediately. Replace the protective cover on the LGA2011 socket and you're done!
If you have any comments or questions, please post them in the PCSTATS Forums. Find out about this
and many other reviews by joining the Weekly PCSTATS.com Newsletter today!
Catch all of PCSTATS latest hardware reviews right here.