Now that PCSTATS has walked you the steps of acquiring a DNS name (or not) and preparing the computer for hosting
a web page, it's finally time to get the Apache web server up and
running. This is actually a very simple process, so follow along and that web
site will be live in no time.
Installing Apache
Apache HTTP server can be downloaded from the Apache Foundation
website here, there is no fee. Make
sure to download the WIN32 Binary file, which comes as an executable MSI
file. The un-compiled source code is also available due to the open source
nature of the project. At the time of writing, the latest version
of Apache HTTP server was 2.0.54.
 Once that executable file is downloaded, start the installation by double clicking on the MSI file.
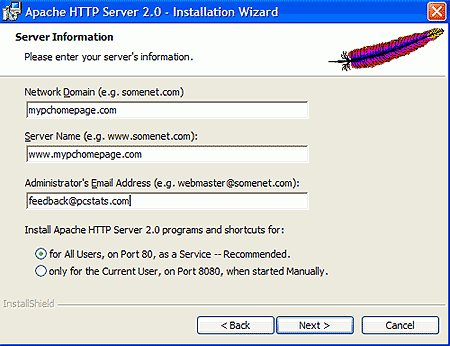
Hit 'next' until the server information screen is displayed (at
left).
Once that executable file is downloaded, start the installation by double clicking on the MSI file.
Hit 'next' until the server information screen is displayed (at
left).
Apache wants three pieces of information here. The domain name and
server name (URL) of the website, as well as an email address where the program
can send alerts and notifications.
If you're not sure, the domain name is the Internet name space that was
registered or obtained, like pcstats.com for example, while the server name is the name
of the machine that is hosting the actual website in that
domain.
In most cases, WWW is the standard name used for web servers, so
if your domain was Pcstats.com, the server name would be www.pcstats.com . If you
used a free DNS or dynamic DNS service to acquire the domain name, you most
likely chose a different server name as part of the process, so use that.
All three of these entries must be filled out to continue the installation
process. If you do not currently have a domain name, either through a
domain registrar or a dynamic DNS service like No-IP.com, enter fictional
addresses like (yourname).com and www.(yourname).com for now. We will
change these once the Apache server program is installed and a domain and server name
have been acquired. Of course, it's better to start the whole installation
process with a valid domain name, so it would be better if you obtained one
now.
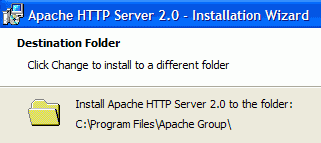
Choose the typical installation option and accept the default installation
folder. Hit 'install' to begin the install process.