PCSTATS     
[X]   Directory of
Guides & Reviews

Beginners Guides
Motherboards by Brand
Weekly Newsletter
Archived Newsletters

+70 MORE Beginner GUIDES....
Beginners Guides: Formatting and Partitioning a Hard Drive
Beginners Guides: Formatting and Partitioning a Hard Drive - PCSTATS
Installing a hard drive for the first time? Need to partition a current drive into smaller disks? You can do it, and we can show you how.
Filed under: Beginners Guides Published:  Author: 
External Mfg. Website: PCSTATS Jan 22 2008   M. Dowler  
Home > Reviews > Beginners Guides > PCSTATS

Physical Installation of the SATA Hard Drive

Find a free 3.5" drive bay in your case. Most computer cases will have a row of covered 3.5" drive bays directly below the floppy drive. If there is no floppy drive, they should be below the CD drive bay. Note that many 'big box' retailers like Dell place hard drives in alternate locations, so your experience may vary.

If you are installing a second hard drive, it's a good idea to leave a space between your old drive and your new one if you can afford to. Hard drives can get rather hot while operating, especially 7200 RPM drives, and this can affect their lifespan. If you are nervous about heat, or you do not have a free 3.5" bay, you can purchase a 5 ΒΌ" adaptor kit at any computer store. This is simply a pair of metal plates that screw on to the sides of the drive and widen it to fit the larger bay size.

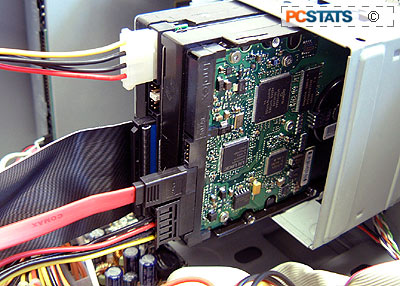
Slide the drive carefully into the free bay with the connector end of the drive facing into the body of the computer, and 
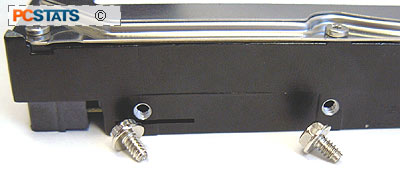
screw it in tightly on both sides. Hard drives generally use larger-threaded case screws like the ones pictured above. These are identical to the screws used to secure the body panels of most computer cases.

Now it's time to plug in the SATA power and data cables. Connect either end of your serial ATA data cable to the corresponding plug on the back of your new drive. The cable is keyed to only fit one way.

Now connect your SATA or Molex power connector to the back of the drive. Again, the cable is keyed to only fit one way.

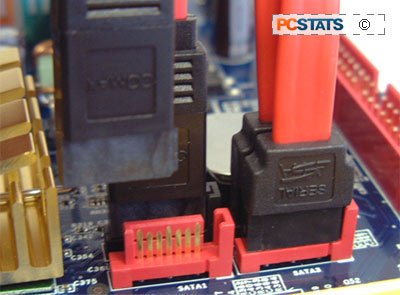
Finally, plug the other end of the SATA data cable into one of the SATA connectors on your motherboard. That's it, there are no master or slave settings to fuss with for SATA drives since each hard drive has its very own cable.

< Previous Page © 2023 PCSTATS.com
Please respect the time and effort that went into creating each PCSTATS Beginners Guide, do not illegally copy. Thank you.
Next Page >


Contents of Article: PCSTATS
 Pg 1.  Beginners Guides: Formatting and Partitioning a Hard Drive
 Pg 2.  SATA and IDE Hard Drives
 Pg 3.  Physically Installing an IDE Hard Drive
 Pg 4.  Preparing an IDE Hard Drive For Installation
 Pg 5.  Physical Installation of a IDE Hard Drive
 Pg 6.  Physically Installing a Serial ATA Hard Drive
 Pg 7.  — Physical Installation of the SATA Hard Drive
 Pg 8.  Confirming the Installation of a Hard Drive
 Pg 9.  Partitioning and Formatting a Second drive in Windows 2000/XP
 Pg 10.  Partitioning and formatting for the Installation of Windows 2000/XP
 Pg 11.  Partitioning and formatting a Second Drive in Windows 9x/ME
 Pg 12.  FDISK Commands continued
 Pg 13.  Partitioning and Formatting a hard drive for Win9x/ME Installation
 Pg 14.  Troubleshooting hard drive installation

 
Hardware Sections 


PCSTATS Network Features Information About Us Contact
FrostyTech
PCSTATS Newsletter
Tech Glossary
Technology WebSite Listings
News Archives
(Review RSS Feed)
Site Map
PCstats Wallpaper
About Us
Privacy Policy
Advertise on PCSTATS

How's Our Driving?
© Copyright 1999-2023 www.pcstats.com All rights reserved. Privacy policy and Terms of Use.