Mounting the Motherboard
Step 6: Installing the Motherboard
Ensure
that the
motherboard mounting area in the case is free of obstructions and that all necessary
risers have been installed in the right spots. If there is an extra riser that does
not line up with a hole in the motherboard, make sure you remove it.
Lower the board into the case as in step 2. Screw the motherboard into the risers.
Note that some forms of risers will not require screws to be used.
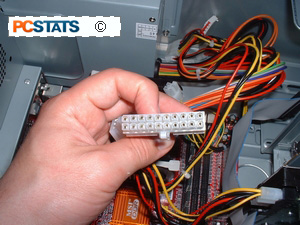
You can figure it out. Once the board has been securely attached, plug in the
24 or 20-pin main ATX power connector (see pic).

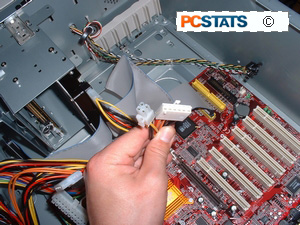
If you
are installing an Intel Pentium 4 machine, you will probably
be required to connect one or two extra power connectors (see
pic).

Plug the
4-pin 12V auxiliary power, and 6-pin power connectors in also. Note: some
motherboards may not require the 6-pin connector at all.
Consult
your motherboard manual for the correct
locations of the 'front panel' power and reset button wires, the power and hard-drive
LED wires and the speaker. Note that the power and hard-drive LED wires
are sensitive to polarity, so they will only work one way around. In theory,
positive and negative will be indicated on the board and the plugs... In practice,
doubtful, so... trial and error. You will not cause any damage if you get
it wrong, though, the LEDs will just not light up.
|
< Previous Page
|
© 2025 PCSTATS.com
Please respect the time and effort that went into creating each PCSTATS Beginners Guide, do not illegally copy. Thank you.
|
Next Page >
|
|

