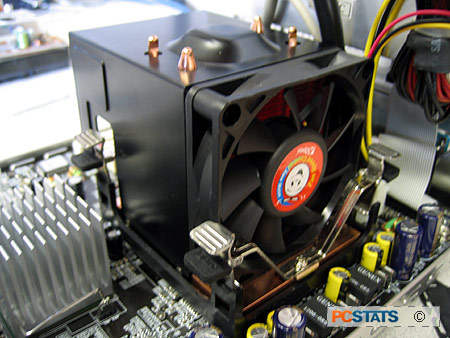
PCSTATS     
[X]   Directory of
Guides & Reviews

Beginners Guides
Motherboards by Brand
Weekly Newsletter
Archived Newsletters

+70 MORE Beginner GUIDES....
Do-It-Yourself Guide: Building a Home Theatre PC / HTPC
Do-It-Yourself Guide: Building a Home Theatre PC / HTPC - PCSTATS
Computers are a perfect fit for the entertainment room, and building a home theatre PC is not more difficult than assembling a standard system - as long as you have the right components for the task.
Filed under: Beginners Guides Published:  Author: 
External Mfg. Website: PCSTATS Jan 20 2006   M. Dowler  
Home > Reviews > Beginners Guides > PCSTATS Beginners Guides

Installing the heatsink

Most Socket 775 heatsinks do not care about orientation; they can be installed facing any direction. This one is different though, since the Aopen XCube is so cramped inside a custom heatsink solution is used which does not correspond to the typical socket 775 heatsink mounting points. The fan needs to face to the right side of the case (as seen from the front) where there is a vent hole; this allows it to draw fresh air into the case. If you have any questions about the case or SFF chassis you may be using, it is best to consult the users manual. SFF chassis in particular often use non-standard heatsinks, so don't be surprised if your situation is different.

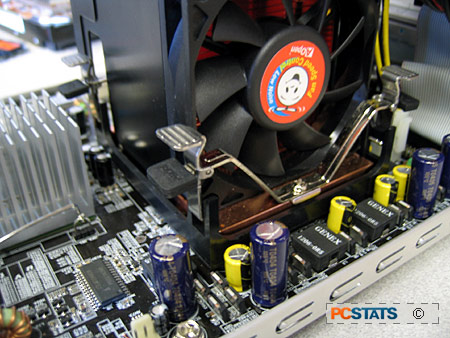
Place the heatsink down on top of the processor so that it aligns with the plastic retention mechanism surrounding the chip. This will correctly line up the base of the heatsink with the processor itself.

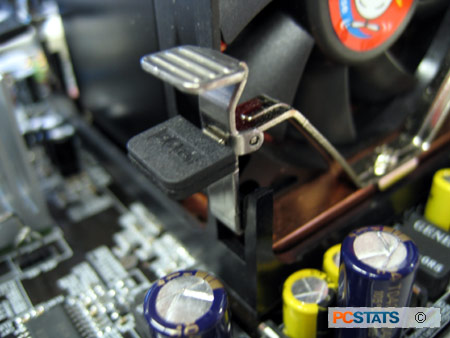
Now it's time to attach the heatsink to the plastic retention mechanism. Various models of cooler use different methods to do this, but it boils down to one of two things; either the heatsink clips directly to the motherboard through the four holes that are currently being used by the plastic socket 775 retention bracket, or the heatsink clips to the retention bracket itself. The heatsink we are working with does the latter.

The metal tab is manipulated so that the hook on the end catches onto the retention bracket, then the black rubber tab is pressed down to lock the hook into place firmly. Repeat the same step for all four corners of the heatsink.

Finally, the power plug for the fan should be plugged into the correct fan header on the motherboard, which will generally read 'cpu_fan' or something similar.

< Previous Page © 2023 PCSTATS.com
Please respect the time and effort that went into creating each PCSTATS Beginners Guide, do not illegally copy. Thank you.
Next Page >


Contents of Article: PCSTATS Beginners Guides
 Pg 1.  Do-It-Yourself Guide: Building a Home Theatre PC / HTPC
 Pg 2.  Ingredients for a Good HTPC
 Pg 3.  Choosing The Video Card
 Pg 4.  Installing the processor
 Pg 5.  Installing the CPU - Continued
 Pg 6.  — Installing the heatsink
 Pg 7.  Installing the DDR Memory
 Pg 8.  Installing hard drives and optical drives
 Pg 9.  Connecting data cables
 Pg 10.  Installing the video card and tv tuner
 Pg 11.  Identifying and connecting the rear ports
 Pg 12.  Connecting the computer to the TV
 Pg 13.  Connecting the Television signal to the TV-tuner
 Pg 14.  Tweaking Windows XP for TV display

 
Hardware Sections 


PCSTATS Network Features Information About Us Contact
FrostyTech
PCSTATS Newsletter
Tech Glossary
Technology WebSite Listings
News Archives
(Review RSS Feed)
Site Map
PCstats Wallpaper
About Us
Privacy Policy
Advertise on PCSTATS

How's Our Driving?
© Copyright 1999-2023 www.pcstats.com All rights reserved. Privacy policy and Terms of Use.